 |
DIY • Do it Yourself • Weekend Projects • BIG Projects • LITTLE Projects | |||||
|
DIY • Do it Yourself • Weekend Projects • BIG Projects • LITTLE Projects | |||||
How Do I Share My How-To?It's really pretty easy, pictures and videos of the steps it takes to complete your project are stored on YouTube and picasaWeb. Once your "final" video is stored on YouTube, your project will show in the listings on the site. All this is controlled by our Creator's Tools. Basically, you start a project by writing up the project idea. Step 1. Sign up for a free Creator's Account to gain access to the Creator's Tools. Step 2. Login Step 3. Push the "Create New Project" button on the Creator's Tools. Make a name (you can change it later) for your project. And describe your plans to use as notes to guide the creation of the steps. Step 4. When you've finished providing all the steps to your project, shooting the videos and saving to google video via the Creator's Tool Panel, you are ready to write the introductory paragraph with an interesting story of how you did it, or how you do it in the case of a professional services presentation. Step 5. Last but not least create and upload the video (to YouTube) which is the video that will be used to summarize the project. If you were building a robot, this final video would show the robot running around, doing fun things that will inspire others to create their version of your project. That's it... Watch the views and ratings for your project pile up along with the sales commissions! Or get a customer because you showed how you remodel a house. |
FAQ About Becoming A CreatorQ. Why would I go to all that work, building something, then put it on a website like C What I Can Do? What's the point? A. Actually, there are a couple of forms for a reward:
|
Building an RFL Inspired Upright Robot Base ... 32044 Views Author's name: WeRbots This is my version of (at least) the base of an RFL upright robot. It works pretty well, but I can't go much further until I get my hands on one of those RFL Football Robots. Then, I'm going to want to make my RFL Robot Base into the most powerful line backer or maybe Center in the RFL... Geez, maybe the "Super Bowl?" Wait a minute. They use like a 9-Volt battery pack and a fancy gearmotor on each wheel... OK then. This bot will make a nice coach bot, or cheerBot... Maybe just half-time entertainment? Geez. Author's Assigned Keywords: Robots RFL Robots (ad) Standing Up Ain't Easy Making an upright robot presents some interesting challenges. Of course we could use a gyro mechanism, but that wouldn't permit such a low price.
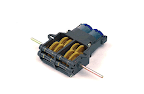
The issues have to do with the dynamic part of the robot, you know where it starts, stops, turns and so on. Where gravity pulls with no mercy as to our checkbook. And this is where things get tricky. When you apply power to the wheels, they move right along, but the first thing that happens is the center of gravity shifts. Oh No! The bot builder has to compensate and in the RFL Robot, this is done with extra wheels, sitting in front and back of the two drive wheels. Now you get the advantages of the quick turns and fast stops and starts and all that stuff that makes a good football player. By restricting the distance the motor moves the body in relation to the drive wheels. We can keep the center of gravity within bounds. First Experiment in Frame Making This is the first crack at limiting the COG. By putting a small frame on one side, using a bunch of spacers hooked together with little wheels, I get the same effect as the RFL robot.
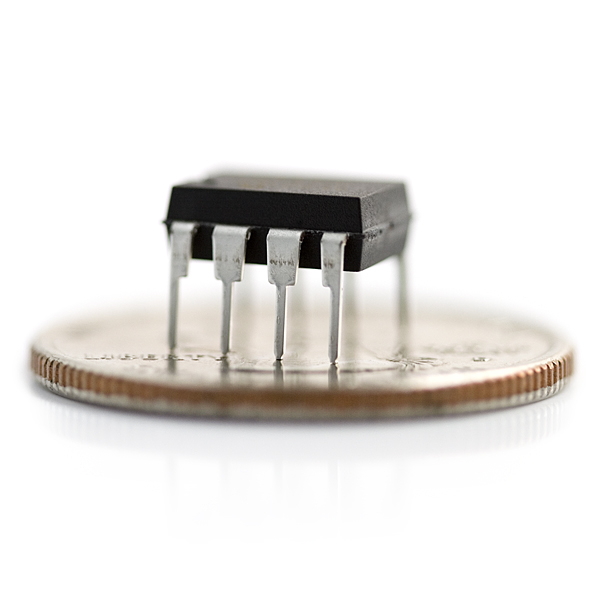
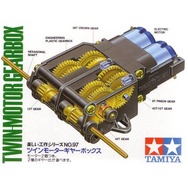
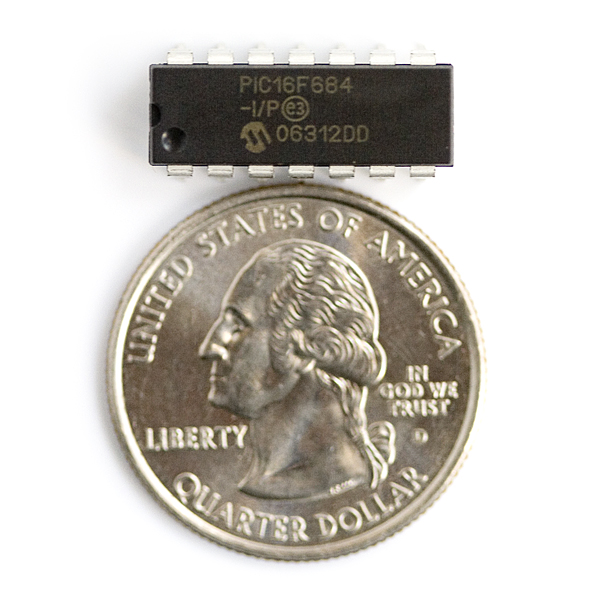
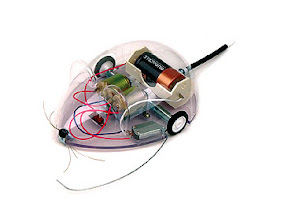
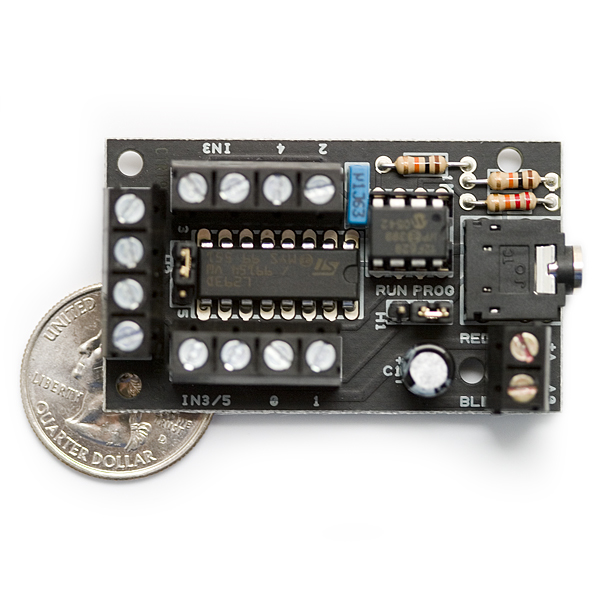
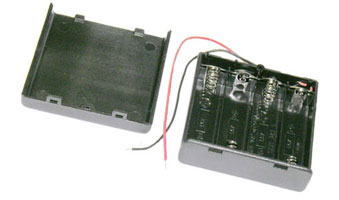
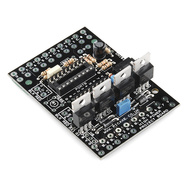
For the back. I bent a hook from a paper clip. For moving forward, the bot can lean on the clip. Moving forward, it leans against the small wheels. Since I didn't have fancy wheels yet, I used wheels from a Track Bot (leftovers). For the small forward wheels, I used some plastic gears leftover from building the Twin Motor Drive. More Power To Ya! Putting the batteries in place was a real balancing act. The batteries would end up having to be pretty much at the center of the bot's body. Experiments Leading To RFL Style I started out in general experimenting with mounting motors in various configurations. This video shows how the experiments began with a battery taped on, and wires twisted together. I was trying to figure out the optimum way to distribute weight on a small robot. That led to standing the motor drive vertically. That led me right back to the RFL Robot Football League Robots. Giving The Beast Motor Control Now I use the frame to strap on a picAxe 18x with Motor Controller. Now's our chance to put some juice to the machine.
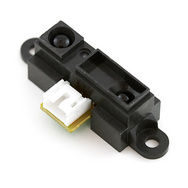
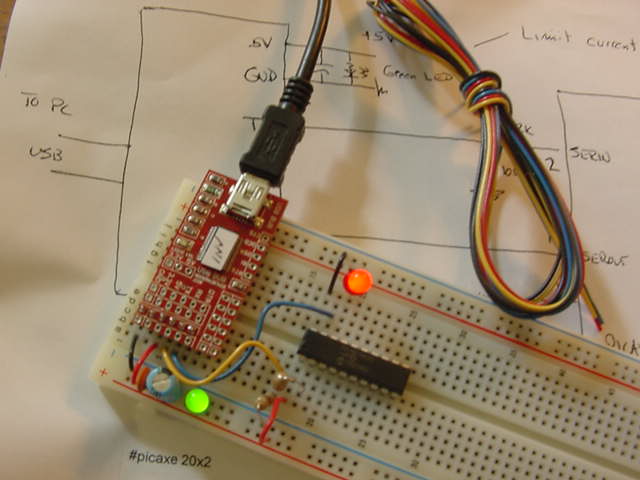
Phase I. Complete: It Works! Putting the picAxe 18x plus motor drive (same one as in dogbot) would be the bees knees... Except for one thing... The power! Oh the power! I used a simple turn right, turn left kind of approach for the initial testing and with one motor, then the other running, each would dig-in to the carpet, not really run along it... Let`s dig into the software and see what we can do to make our bot civilized, using it`s brains to direct it`s brawn.... The wheels came in the mail, they just push right on to the twin motor gearbox... I`ve got things taped and wired together, just to be sure this whole idea will work... I stuck an IR detector at the top of this configuration in hopes of giving this thing some ability to navigate collisions with objects... Remove the Tape: Making It Workable These are seeming to be disasters... I got the new wheels, they provide better traction, but now the upright bot has falling over issues when it jumps forward or backward...
I figured I'd have to readjust things a bit... Then I got myself a handful of these grounding straps... These things are easy to bend and that allows me to clean up the design by bending brackets for the "shoulder pads." Now the batteries transfer their weight to the wheels by virtue of angled brackets that attach to the screws that hold the motor-body together. This works well... Stand back RFL "Bots" My little critter will at least make a great cheerleader robot! The Optimum Drive? If we were using a set of sensors, we`d want to know when the slightest tilt occurred and we would move the bot against the pulls of shifting centers of gravity. But when we stop, we are still moving, jiggling a little as it were. And the way we stand up is by moving. RFL bots are supposed to stop when and where the action goes. It seems the guys at RFL knew this and built a bot to work well in games. When the action stops the robots stop. All the action stops in place and it gives the RFL Robot a chance to compete. So the low-cost uprighting system in the RFL bot seems to be the way to "play the game," so to speak. So we learned the battery position by playing around with the format. And you can see the 4-pack battery on top of the Motor Assembly. It's Easy To: C - What - I - Can - Do • Sign up - Get ID and Password• Plan and Create a Project That Someone Might Enjoy and May Even Want to Build• Link to your creation on your favorite social networking site or blog.• Become famous! Because your projects get a lot of Hits!
|
By Creators DoctorZoidberg: Converting a Flashlight to LED DoctorZoidberg: Home Project: MUTE TV Wearable TV Muter! DoctorZoidberg: Scare Crow - For Modern Gardens - Home Project jim: CwhatIcanDo Website jim: Tour This Website PaulSandin: Butler, a low-cost mobile robot base WeRbots: BEAM BOT: HexBug Exposed! WeRbots: Buggy Bot: Wire Frame Bot Body WeRbots: Easy Cheap Robot Weekend Project WeRbots: RFL Robot Out Of The Box Experience WeRbots: Robot Man: With Robot Demos WeRbots: Build Your Own Track Drive Robot WeRbots: Build a Robot In 5 Minutes WeRbots: i-Mon App WeRbots: How To Make A Virtual Robot in FLASH WeRbots: Droid From Motorola :: A Robot ? WeRbots: Robots Almost Anyone Can Afford WeRbots: How To Build a Robot in a Box WeRbots: picAxe 18m2 for robotics WeRbots: Build a Respectable Autonomous Robot WeRbots: On Line Neighborhood Watch WeRbots: Pong))))) WeRbots: Roboteer`s Guide to BeagleBone Black WeRbots: Autonomous Robot PVC "Pickup Truck" |
By Keywords Action Script 2: How To Make A Virtual Robot in FLASH Ajax: CwhatIcanDo Website Ajax: CwhatIcanDo Specs: RC2 Ajax: battle Android: Droid From Motorola :: A Robot ? Android: battle batting cage installation: Home Installation of a 4 Section In-Ground Batting Cage BEAM Robots: BEAM BOT: HexBug Exposed! BEAM Robots: picaxe 8m: Wall Follower Mouse gets Majorly Modded BEAM Robots: How to build simple analog balancing robots BEAM Robots: battle Block Watch Cam: On Line Neighborhood Watch Cheap Robot: Easy Cheap Robot Weekend Project Cheap Robot: How To Build a Robot in a Box Cheap Robot: Autonomous Robot Built From Power Chair Wheelchair commercial killer: Home Project: MUTE TV Wearable TV Muter! Convert Your Flashlight to LED: Converting a Flashlight to LED Create a Project: HELP :: How To Create a Project CwhatIcanDo HELP: HELP :: How To Create a Project Do it Yourself: Robots Almost Anyone Can Afford Do it Yourself: Scare Crow - For Modern Gardens - Home Project Do it Yourself: Wheelchair Works 3 Ways: Manual, R/C, and Autonomous Do it Yourself: On Line Neighborhood Watch Droid Smart Phone: Droid From Motorola :: A Robot ? Easy to Make Robot: Easy Cheap Robot Weekend Project entertainment: Home Project: MUTE TV Wearable TV Muter! FLASH Applications: How To Make A Virtual Robot in FLASH HELP: Tour This Website How To: CwhatIcanDo Website How To Build Cheap Bots: Robots Almost Anyone Can Afford How To Build Cheap Bots: How To Build a Robot in a Box How To Website: Tour This Website How To Website: CwhatIcanDo Website Infrared Proximity Sensor: Build Your Own Track Drive Robot IR Detector: Build Your Own Track Drive Robot Lighting Projects: Converting a Flashlight to LED logic analyzer: An affordable Logic Analyzer for the workbench. multi: Multi Media Messaging Device Mute the TV: Home Project: MUTE TV Wearable TV Muter! open source: An affordable Logic Analyzer for the workbench. picAxe: Build Your Own Track Drive Robot picAxe: picAxe 18m2 for robotics picAxe 08m: Robots Almost Anyone Can Afford picAxe 14m: picAxe 14m Motor Driver Board: Make Your Own picAxe 14m: How To Build a Robot in a Box picAxe 18m2: picAxe 18m2 for robotics picAxe 18m2: Weekend Project: Get Started With Robots picAxe 18m2: Build a Robot From A Power Wheelchair picAxe 18m2: Autonomous Robot Built From Power Chair Wheelchair picAxe 18m2: Wheelchair Works 3 Ways: Manual, R/C, and Autonomous picAxe 18x: How To Build a Robot in a Box picAxe 18x: picAxe 18m2 for robotics picAxe 18x: Build a Robot From A Power Wheelchair power wheelchair: Wheelchair Works 3 Ways: Manual, R/C, and Autonomous Quick Build Robot: Build a Robot In 5 Minutes RFL Robots: Building an RFL Inspired Upright Robot Base RFL Robots: RFL Robot Out Of The Box Experience robot bending: Morphibian Land Shark robot bending: Build a Robot From A Power Wheelchair Robot Man: Robot Man: With Robot Demos Robot Motor Control: Build the L298 H-Bridge Motor Control Robot Motor Control: Robot Basics Robot Motor Control: picAxe 14m Motor Driver Board: Make Your Own Robot Motor Control: Buggy Bot: Wire Frame Bot Body Robot Motor Control: picAxe 8 bit Motor Controller: Look Inside Robot Motor Control: How to build simple analog balancing robots Robot Motor Control: Build a Robot From A Power Wheelchair Robot Motor Control: Autonomous Robot Built From Power Chair Wheelchair Robot Pets: DogBot the Robo Dog : Robotic WatchDog Robot Pets: Operation of the Tri-Bot From Wowwee! Robot Pets: Robot Man: With Robot Demos robotics: Droid From Motorola :: A Robot ? robotics: Easy Cheap Robot Weekend Project Robots: BEAM BOT: HexBug Exposed! Robots: Robot Basics Robots: Buggy Bot: Wire Frame Bot Body Robots: Build a Robot In 5 Minutes Robots: Build Your Own Track Drive Robot Robots: Easy Cheap Robot Weekend Project Robots: How To Build a Robot in a Box Rumble Bot Conversions: Robots Almost Anyone Can Afford Security System: On Line Neighborhood Watch Select or type in a Keyword: Converting a Flashlight to LED track drive robot: Build Your Own Track Drive Robot Virtual Pet Robot: How To Make A Virtual Robot in FLASH web: CwhatIcanDo Website web 2.0 site: CwhatIcanDo Website web 2.0 site: CwhatIcanDo Specs: RC2 Weekend Project Robots: Easy Cheap Robot Weekend Project Weekend Project Robots: Weekend Project: Get Started With Robots |
Click To Expand / Contract Menus. View by Creator, Category, Keywords or Number of Views.